Setup Email on iOS email app
This tutorial covers the standard email app for Apple iOS which powers iPhone and iPad. The screenshots for this tutorial were taken from an iPhone but the process for iPad is similar.
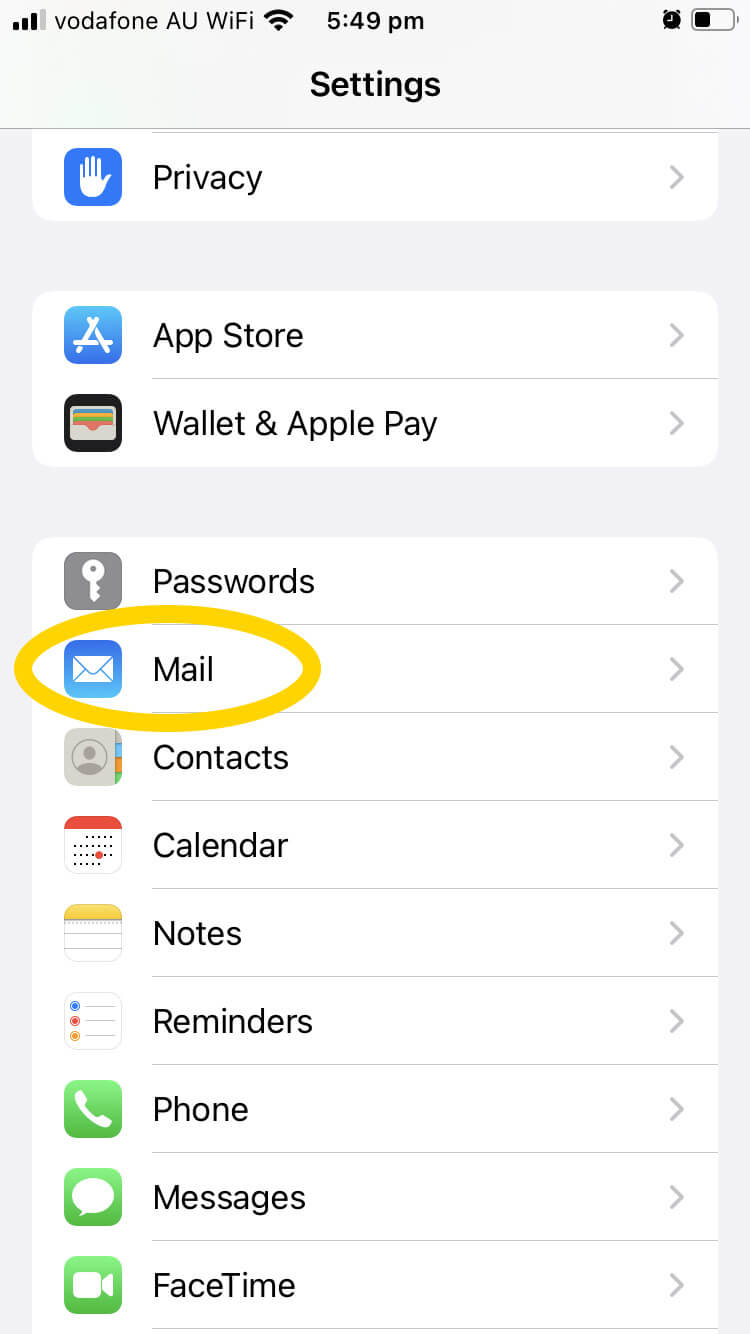
Pick up your device. Select the Settings icon shown below.
![]()
Open the Mail settings screen. On some older devices this link may say Mail, Contacts, Calendars.
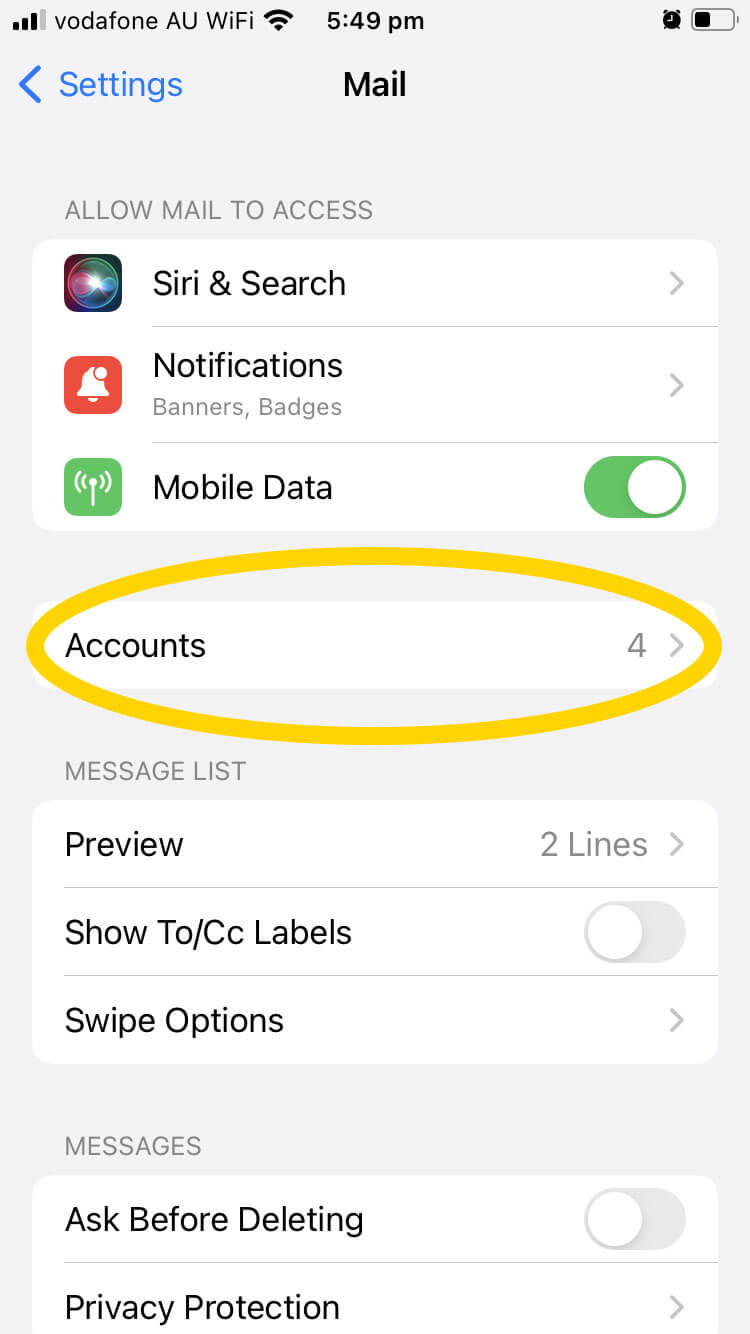
In the Mail settings screen, select Accounts.
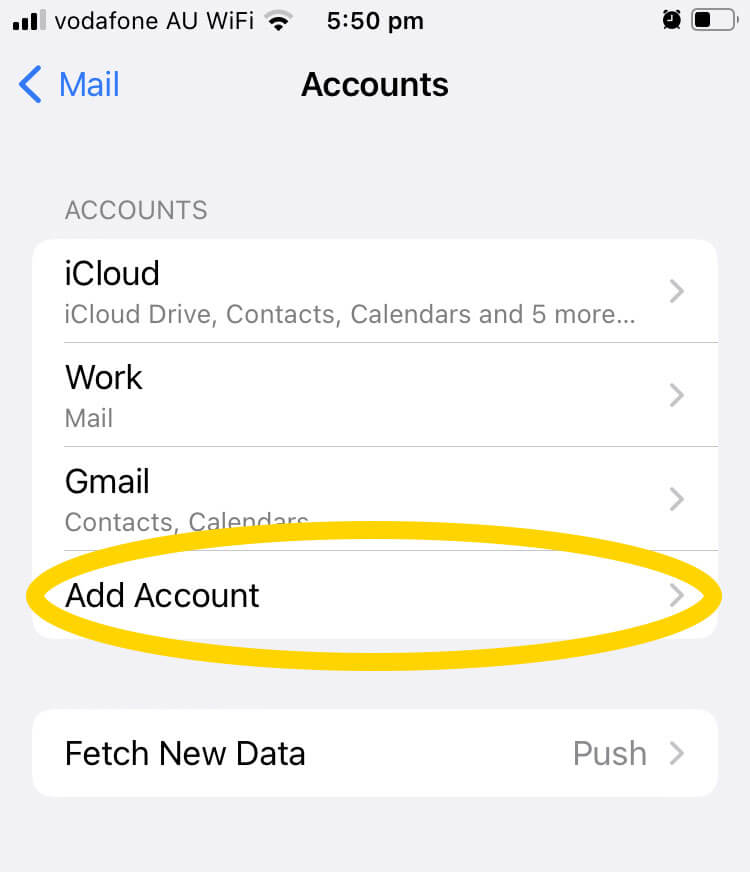
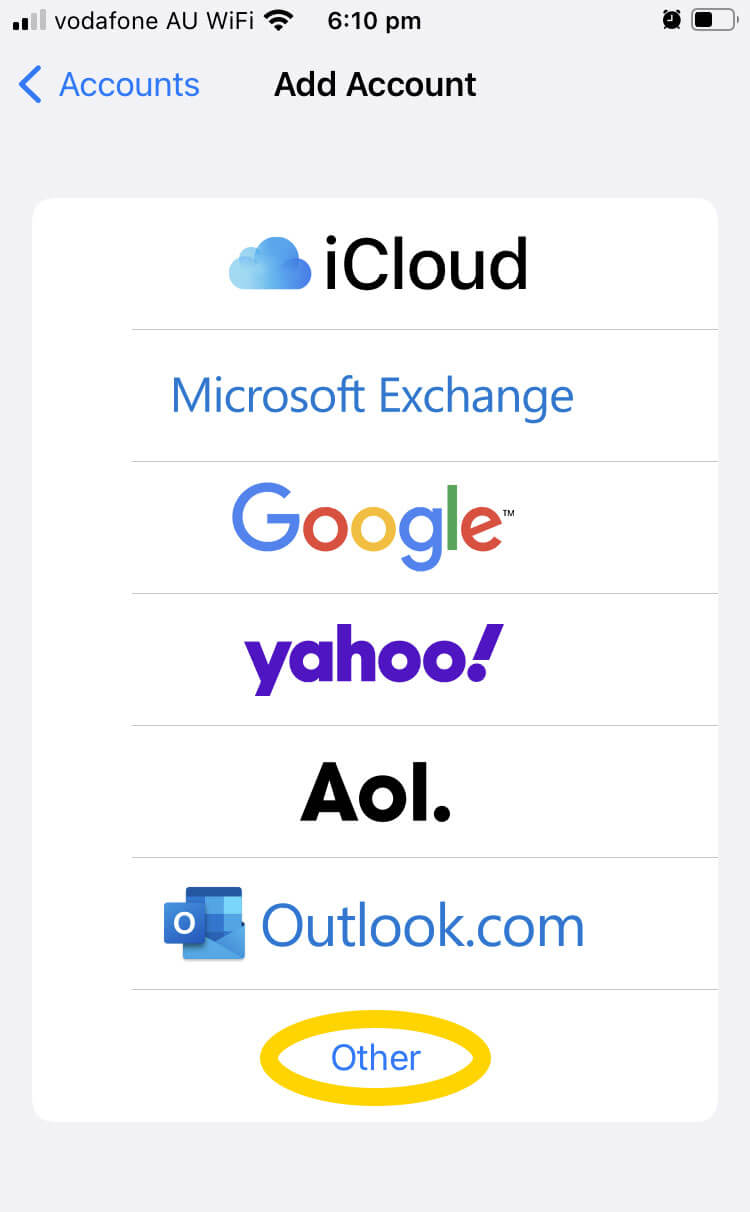
In the Accounts screen, press Add Account.
Select Other as provider.
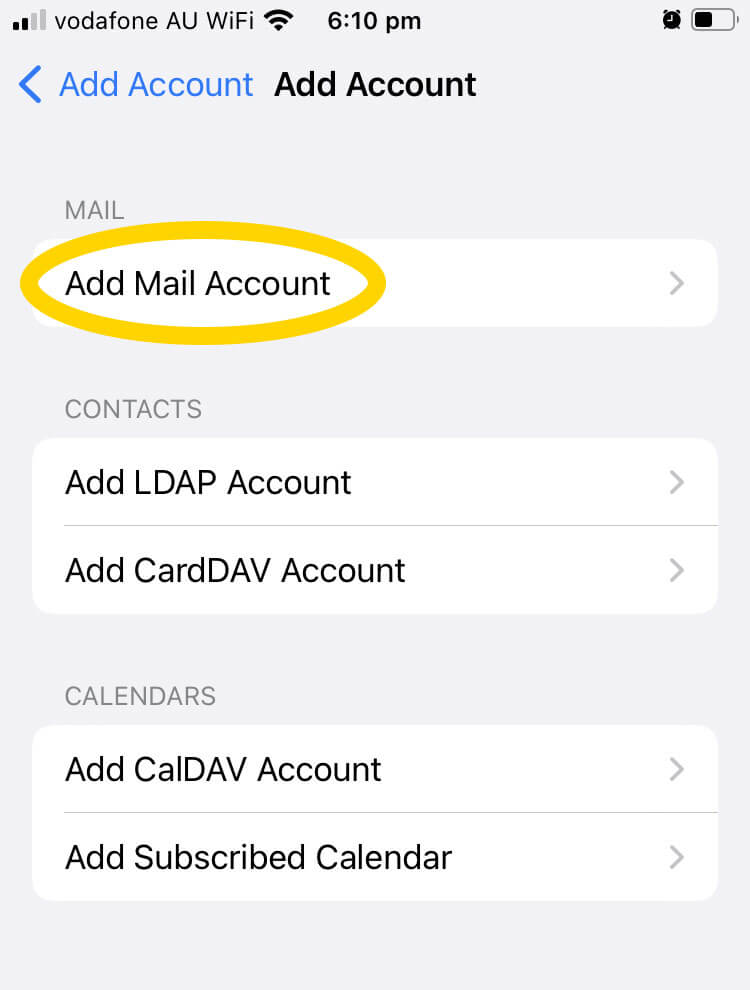
Select Add Mail Account.
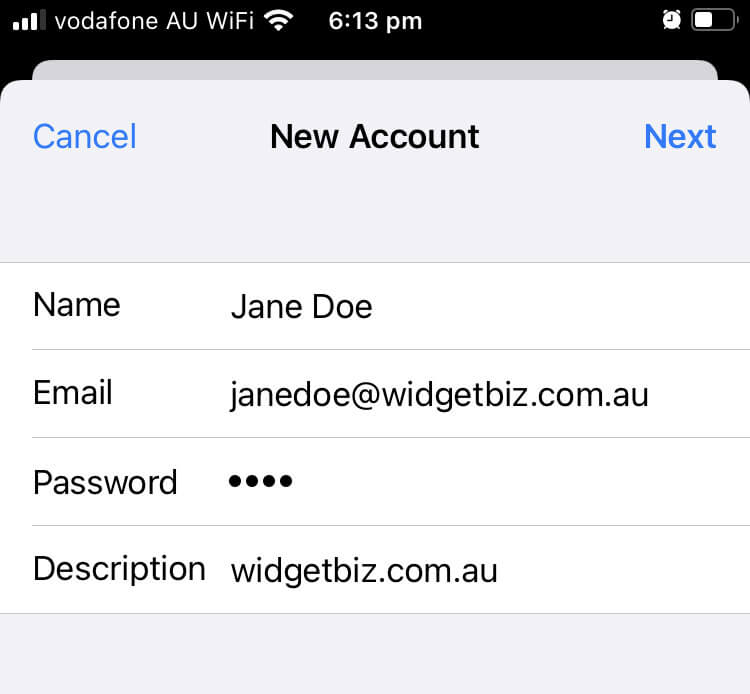
Now you enter some basic email account information. Enter account details below.
- For Name enter whatever you want this email address to identify itself as to recipients. Usually this will be your actual name, but might be something like Enquiries or Support.
- For Email enter your full email address.
- For Password enter the email account’s password.
- Enter anything in Description.
- Press Next.
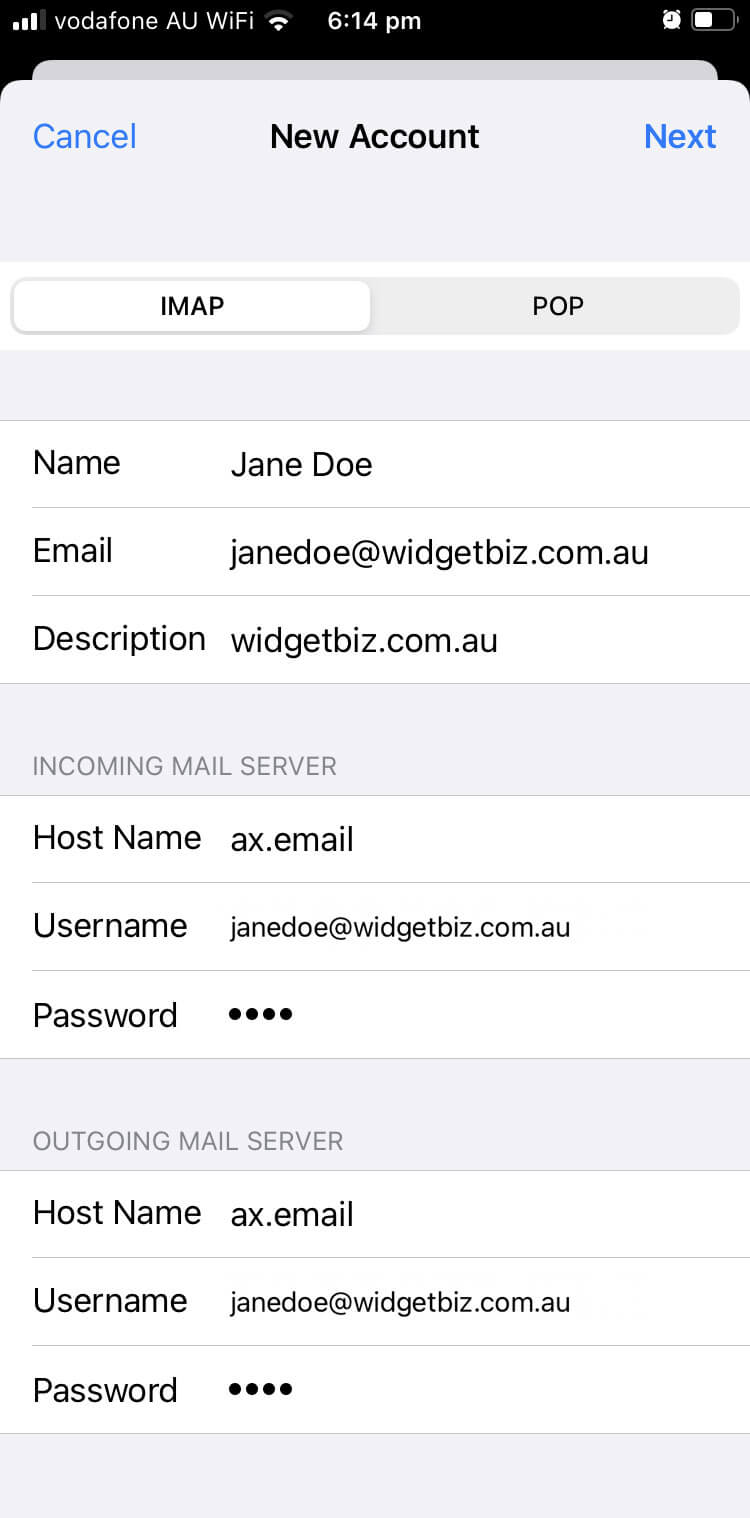
You’ll be prompted for more detailed account information. Some of the fields should be prefilled by the entries you made in the previous screen. Fill in the rest of the server configuration as per below.
- Select IMAP, don’t select POP.
- For INCOMING MAIL SERVER:
- For Hostname enter ax.email.
- For Username enter your full email address for both Incoming and Outgoing mail server.
- For Password enter the email account’s password.
- For OUTGOING MAIL SERVER:
- For Hostname enter ax.email.
- For Username enter your full email address for both Incoming and Outgoing mail server.
- For Password enter the email account’s password.
- Press Next when done.
Your phone will attempt to verify the server. If connection succeeds you will move onto the next screen. If not, a popup will appear which says Cannot Verify Server Identity. Press Continue and make sure settings are entered correctly and that you’re connected to the internet.
If you still can’t verify try entering mail.yourdomain.com.au as the incoming and outgoing host name, substituting in your own domain. In this example the domain would be mail.widgetbiz.com.au.
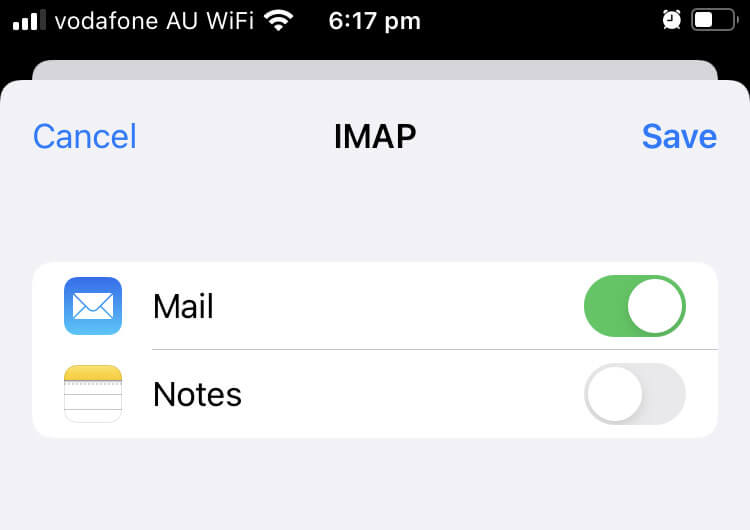
On the next screen ensure Mail is activated. You can optionally enable Notes or any other available services. Press Save.
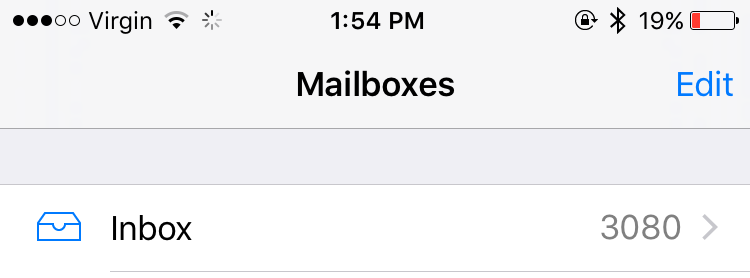
Enter the mail app by clicking the Mail icon shown below.
![]()
You should be able to see the inbox for your email account.
Try sending and receiving emails as a test.
If anything seems amiss check details on the Advanced account options screen. You can get to this screen by opening the account options and then pressing Advanced as per below
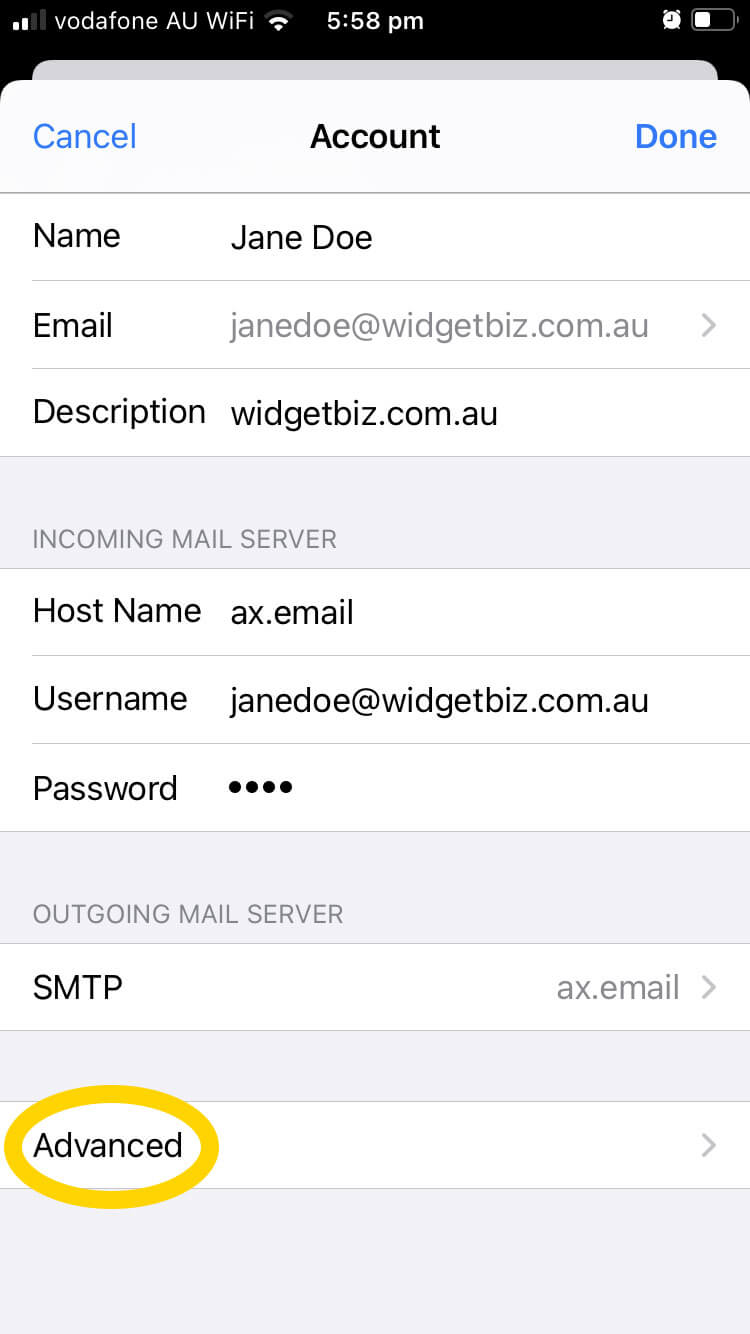
On the Advanced screen, check the following details:
- Under INCOMING SETTINGS:
- Enable Use SSL.
- Ensure Authentication is set to Password.
- Ensure Server Port is set to 993.

That’s it. Enjoy your email!