Working with Menus
Almost every website has at least one navigation menu that visitors use to get around the site. Some examples are shown below.

As you add and change content you will want to add and change the menu of your site. To add items to a menu:
- Use the navigation menu to go to Appearance > Menus. You’ll see a screen like the one below.
- Select the menu you want to edit.When you’ve chosen click ‘Select’ to display the menu in the main display window.

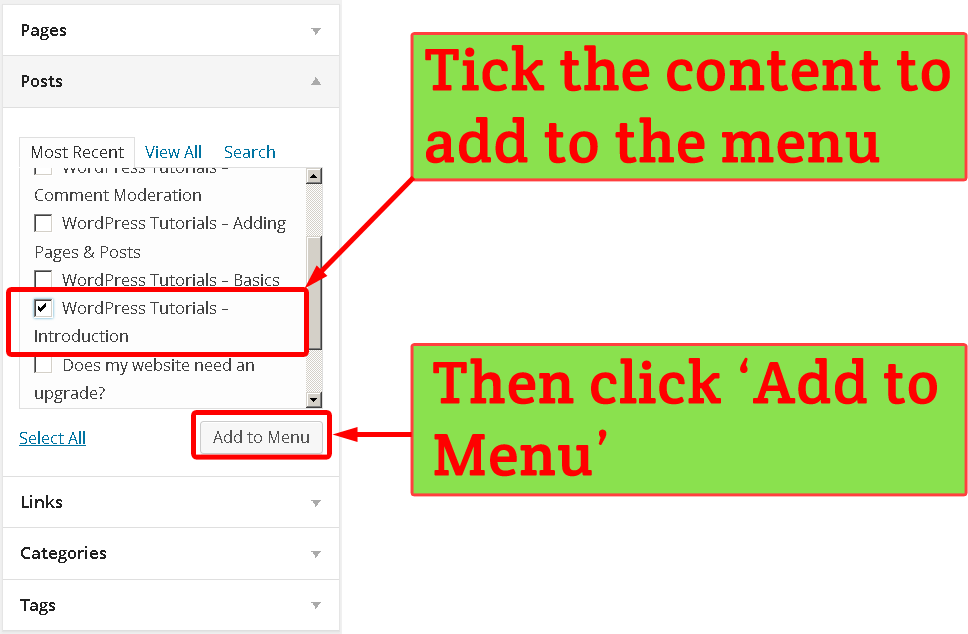
- Next select the content you want to add to the menu. Tick it and click ‘Add to Menu’. You can add more than one thing at once. In the image below I’m adding the intro to the WordPress tutorials.

- In the ‘Menu Structure’ box the new content will appear. If you want to you can change the ‘navigational label’ and add a ‘title attribute’ as shown in the image below. The ‘navigational label’ sets the wording on the link that your visitors see. I’ve changed mine from ‘WordPress Tutorials – Introduction’ to ‘WordPress Tutorials’. The ‘title attribute’ will be displayed when a visitor hovers over the menu link.

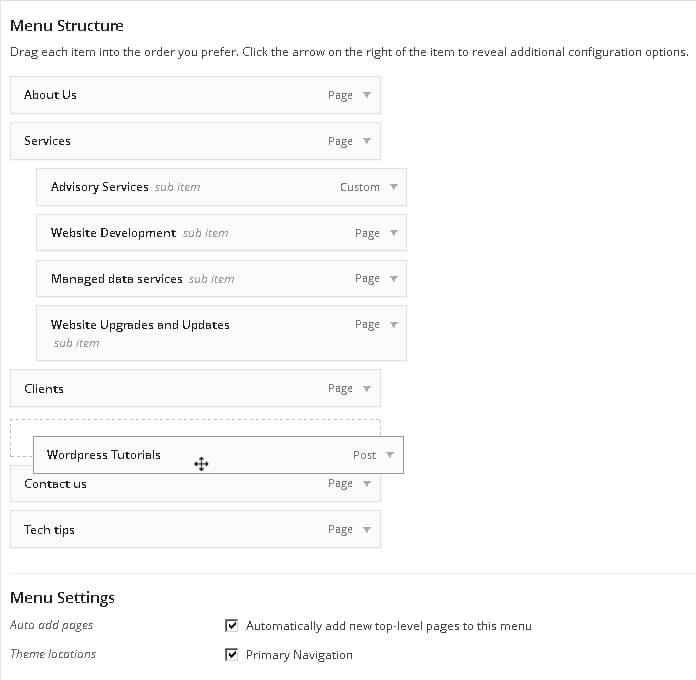
- Set the links order in the menu by clicking on it, holding the mouse down and dragging it around. You can see the ‘WordPress Tutorials’ item being dragged in the image below. Using this method you can drag the link so that it becomes a sub-item of another menu item. Items that are sub-items are labelled ‘sub item’ next to their name .‘Advisory Services’, ‘Website Development’, ‘Managed data services’, and ‘Website Upgrades and Updates’ are all sub-items of ‘Services’. These items will be shown in a drop-down menu when hovering over the ‘Services’ menu link.

- When the menu is how you like it, click the ‘Save Menu’ button. Our menu with the new link is shown below.

You can read more about menus at the WordPress codex menus page.
What Next?
If you have more than one person logging into your site you’ll need to know how to manage them. Learn how in our managing users tutorial.


