Setup Email on Outlook 365
If you’re using Outlook desktop software in Windows, you’re probably using Outlook 365, which is part of Microsoft’s modern subscription Office 365 package.
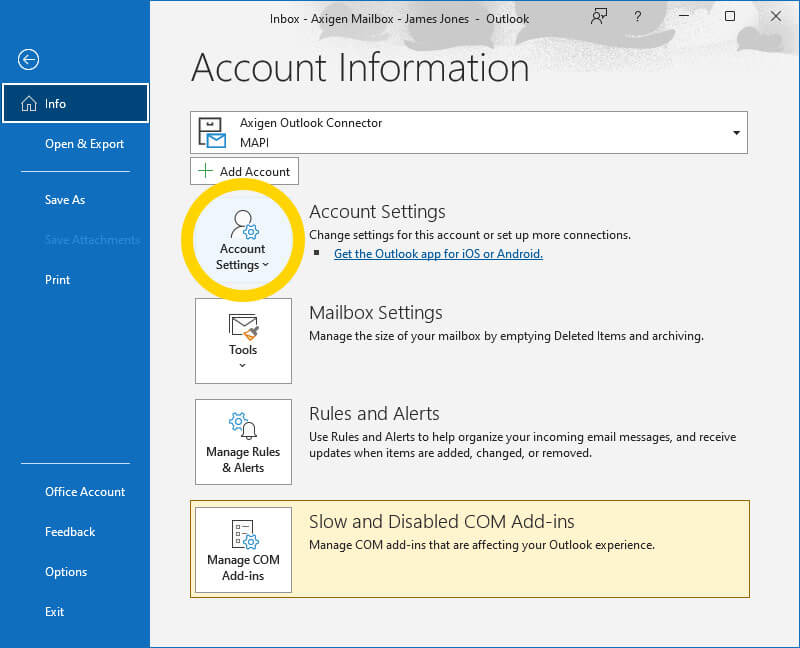
Open up Outlook. Open File in the top ribbon. Then click Account Settings.
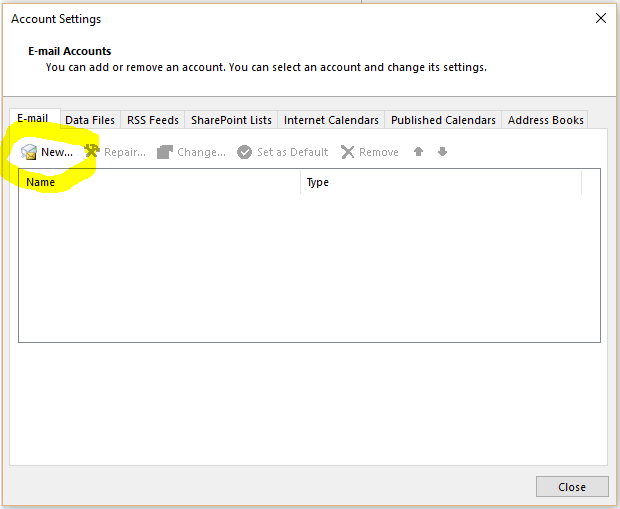
The Account Settings window appears. Select the E-mail tab and click New. Don’t worry if you already have some existing account, it won’t be overwritten.
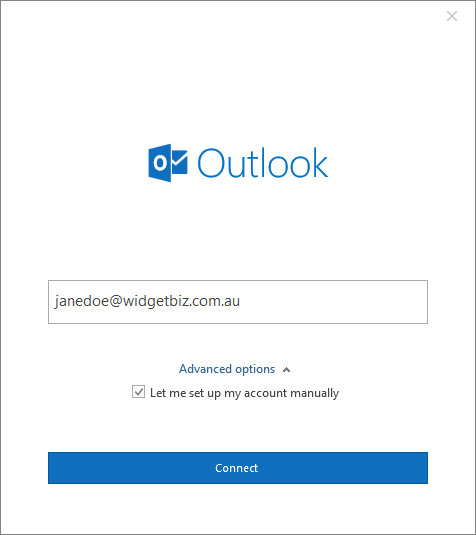
On the next window enter the email address you want to setup and tick Let me set up my account manually. Then click Connect.
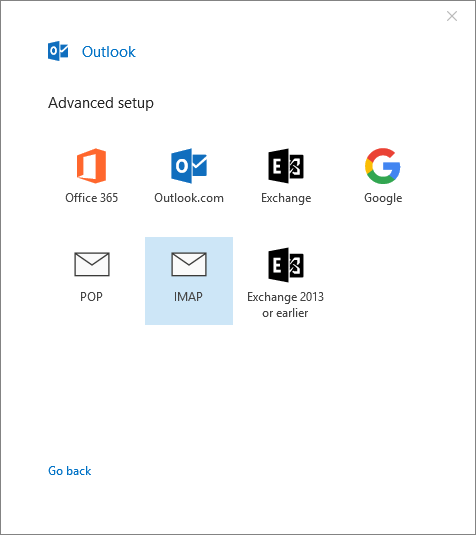
You’ll be prompted to select which type of email address you’re setting up. Select IMAP.
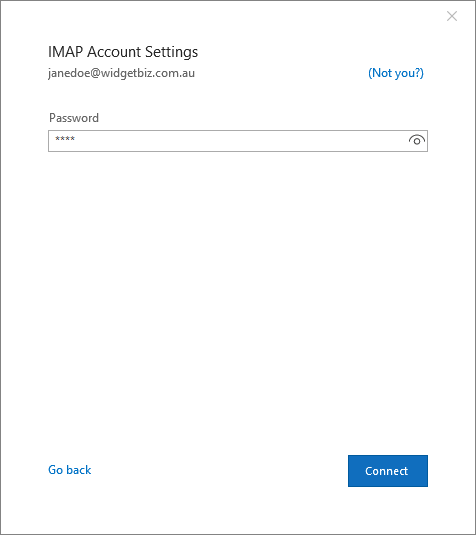
Next you’ll be prompted to enter the email address password. Enter it then click Connect.
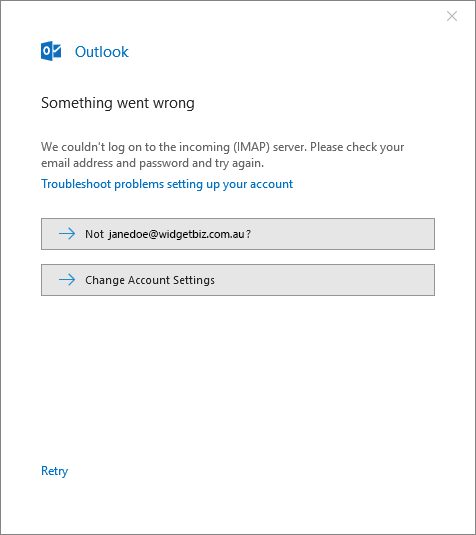
Remember how we selected Let me set up my account manually a few steps ago? Often, Outlook will decide it knows better and attempt to connect to the email server automatically. If you’re lucky, Outlook will actually work things out itself and successfully connect. But this depends on which exact version of Outlook you’re using. If it succeeds, then skip the next step. If it fails you’ll be presented with this window saying Something went wrong. Click Change Account Settings.
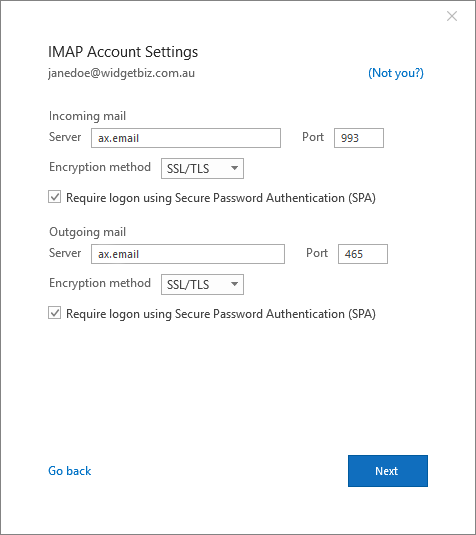
If Outlook’s automatic configuration failed and you clicked Change Account Settings you’ll now see the IMAP Account Settings screen. Enter the main connection details, substituting the dummy account info in the images here with your own credentials.
- In Incoming mail
- For Server set ax.email.
- For Port set 993.
- For Encryption method select SSL/TLS.
- Tick Require logon using Secure Password Authentication (SPA).
- In Outgoing mail server
- For Server set ax.email.
- For Port set 465.
- For Encryption method select SSL/TLS.
- Tick Require logon using Secure Password Authentication (SPA).
Then click Next.
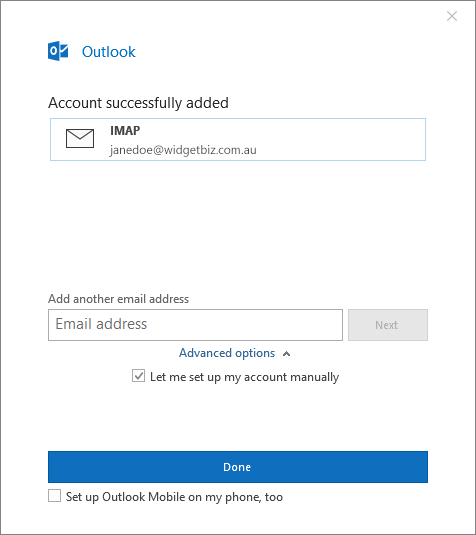
If you got the details right or Outlook guessed right you’ll see this success window. Click Done. If connection failed you’ll want to recheck all the entered details, especially the password, and make sure you’re connected to the internet. If email still fails to connect, try entering mail.yourdomain.com.au for the incoming and outgoing server, substituting in your own domain. In this example the domain would be mail.widgetbiz.com.au.
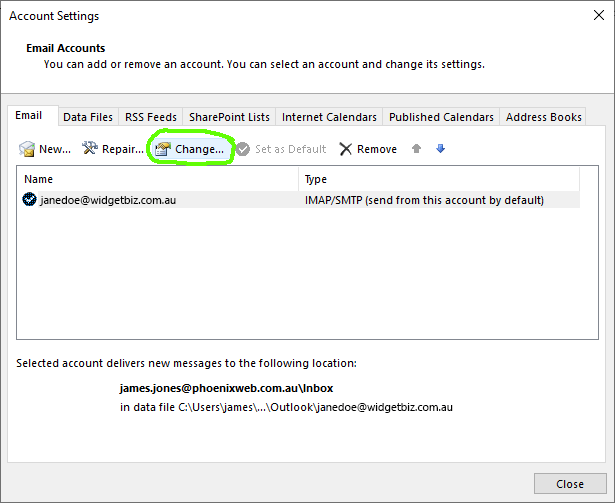
Once the email address is working you can setup some optional settings. Go back to the Account Settings window and click Change with the account selected.
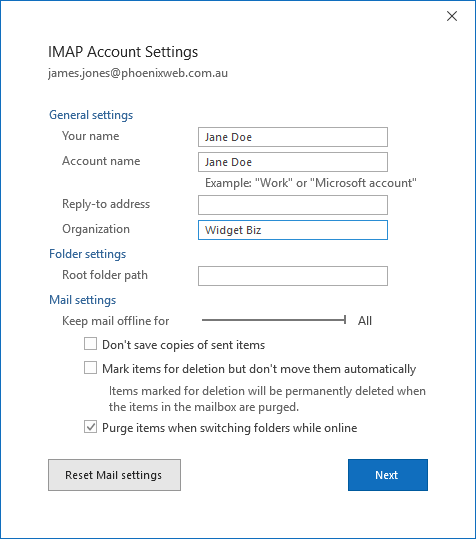
You’ll be taken to a different settings page. Here you can enter your name and organisation that people see when they receive your emails. Once you’ve typed in what you want, click Next.
You’re done!